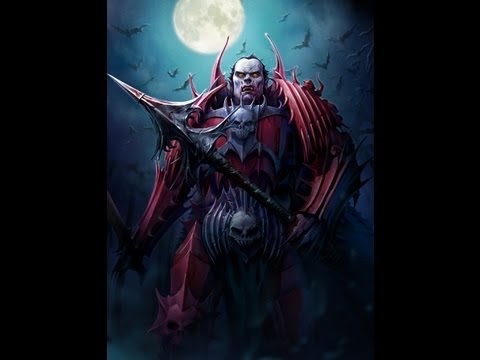
Monday, 22 June 2015

Whatever happened to the Red Duke? A Warmaster 3,500 point-a-side Battle Report - part 2

TURN 1

 
The Beastmen kicked off proceedings as they have the initiative and the Red Duke has invaded their turf.

BEASTMEN

COMMAND PHASE

The Gor Shaman orders two units of Harpies up to the Summoning Circle to occupy it.


He then orders a second brigade of two Harpy units up to the Standing Stone to gain control over it.


Malagor, the true mastermind behind the Beastmen (don't tell the Beastlord General this!), orders a brigade of Gors and Chaos Spawn forward to close the gap to the Standing Stone and back up the Harpies there.


Malagor (on the right - with the wings - in the photo above) then fails in a second command role and this Gor/Chaos Spawn brigade stalls.

The Minotaur Shaman bellows for a brigade of Gors and Bestigors to back up the Harpies at the Standing Stone. Amazingly the Shaman succeeds in a second order despite distance and second order penalties, but the brigade fails to hear its third bellows to move forward and they halt after their second order.


The WarGor orders the brigade or Centigors and Razorgors forward. The WarGor also succeeds in a second command order and the brigade moves forward again.


The WarGor then attempts to move the Chaos Hounds forward but the stinking mutts ignore his yells and choose to role around in the dirt and bite their fleas instead.

The WarGor hero named 'Jim' (named after the Pendraken mini's ID on the Pendraken website) orders the Shaggoth forward. Jim manages to communicate with the monster a second time and the thing shambles forward a second time.


Feeling good about himself, Jim decides to give the Chaos Giant a go... and promptly fumbles his orders! Checking the Giant Goes Wild table, Jim rolls a 4. Amazingly the Chaos Giant lumbers forward. The Chaos Hounds scattering to get out of the way and become Confused.


The Beastlord General (resplendent in his Razorgor Chariot) then succeeds twice in moving the Minotaurs forward. With one final brigade of Ungors left to move, the Beastlord General bellows the order to move forward, and they do. Bellowing a second time, they pass a second move test and head forward. With nothing left to loose, the Beastlord bellows a third time. His threats hold true and the Ungors make a third move. A forth order however fails.

The Command Phase over for the Beastmen, Malagor moves forward towards the Standing Stone.


The Beastlord General also moves up.


Jim catches up with the Chaos Giant and gets to within yelling range of the Shaggoth.


The Gor Shaman takes up position hiding in the woods.


The Beastmen now are spread out all across the field, their battle-line looking more like a scatter diagram than a linear feature.


SHOOTING PHASE

No Beastmen units are within any shooting range of the Undead, and so the Minotaur Shaman decides to cast the Beastmen spell Hunting for Gor, but fails!


The Gor Shaman also attempts casting the same spell, but also fails. Finally Malagor gives this same spell a go and succeeds in moving forward a single unit of Gors to joining a unit of Ungors.

With no combat available, the Beastmen turn is over.


VAMPIRE COUNTS

COMMAND PHASE
 
The Red Duke has managed to escape the severe defeat inflicted upon it by the Bretonnians and retreated into the Forest of Chalons. However, once night fell upon the battlefield and the victors returned to their homes, the vampire raised a small contingent of its shattered forces, then pushed deep into the forest. Raising more undead upon the way, the Red Duke made for two sources of power within the forest. Now, emerging into a large clearing, the vampire will not suffer another defeat!


The VC's turn begins with a check to see how the Mortis Engines Reliquary is holding up (see the house rules at the bottom of the Mortis Engine post).

The check results in a double 3...Disaster! Any double means that the Reliquary explodes. Given its the VC's first turn, and the roll was a double 3, a total of 7 shooting attacks occur on all units within 7cm of the Mortis Engine. Ouch!


The Mortis Engine is destroyed in the energies released from its Reliquary. The Terrorgheist suffers a measly 1 hit after armour saves. One unit of Skeletons suffers 4 hits after saves and looses a stand. Another unit of Skeletons suffers 2 hits after saves, and a final unit of Skeletons suffers 1 hit after saves. A unit of Grave Guard looses a stand and a second unit of Grave Guard suffers 2 hits. Finally a unit of Zombies suffers 2 hits. The only saving grace is that no spell casters are within range of the explosion and so remain unaffected. The Red Dukes day is not off to a good start!


One of the Mounted Wight's orders the Dire Wolves forward and then a brigade of Black Knights and Ghostly Riders. A second successful order moves the Black Knights/Ghostly Riders forward again.


The Wight then orders a brigade of Zombies forward, followed by the Dire Wargs. Finally another successful set of commands sees the Crypt Horrors catch up with the rest of the brigades that have headed out. After such success, and the disaster of the loss of the Mortis Engine, this Wight suddenly finds himself on the Red Dukes Christmas Card list! Not much has gone right for the vampire of late, so its nice to finally get some success.


The Lich on the far left flank then orders the Bat Swarms forward to engage the Harpies at the Standing Stone. Eager to get away from the remnants of the ear splitting blast of the Mortis Engine, they willingly oblige. In fact, the Red Duke cant be sure if the Bat Swarms heard the order, or were fleeing the blast and just happened to head in the right direction!


The Lich then orders a brigade of Skeletons forward, then turns its attentions towards the Terrorghiest. The creature must have been rendered temporarily deaf from the blast of the Mortis Engine as its fails to budge.

The other Mounted Wight King then issues orders to move the Grave Guard brigade but fails with a roll of 11 (the Red Duke mentally notes to cut this guy off his Christmas Card list).


Now its the second Lich starts to issue orders. It successfully moves the Skeleton Cavalry forward towards the Summoning Circle. The distance and second order penalties however leave the Lich not wanting to risk failure in another set of orders (and being dropped off the Christmas Card list) and so instead orders a brigade of Skeletons forward to cover the VC right flank. Two successful orders see the Skeletons move up in good order.


Next the Lich orders the Ghostly Legions forward successfully and they move into position behind the Skeletons. The Lich's place on the Red Dukes Christmas Card list is definitely safe for now.


The Command Phase over, the VC commanders move up to take better positions across their battle line.


The Red Duke moves out in front to taunt his foes!


...and to watch the carnage about to happen at the Standing Stone.


The two armies now face each other across the battle field. The VC's looking far more ordered than the Beastmen.


SHOOTING PHASE

Like the Beastmen , the VC's have no shooting units within range (in fact the VC army list is very light on shooting types!), so its up to the Spellcasters to do their thing.

One of the Mounted Wight Kings gives casting Vanhel's Dance Macabre on the Terrorgheist but fails. The beast must still be stunned by the blast from the Mortis Engine!

The Red Duke try's to Raise Dead on the Harpy/Bat Swarm engagement at the Standing Stone but likewise fails.


COMBAT PHASE

Only the one engagement to speak of, the Harpies verses the Bat Swarms at the Standing Stone. The Bats end up scoring 10 hits to the Harpies 7, after saves, and force the Harpies back a few centimetres.


The Bats no doubt were frenzied by the Mortis Engine blast because they pursue the Harpies and give them a mauling, doing another 9 hits to the Harpies 3! The Harpies end up getting wiped out for the loss of a few Bat Swarm stands. More importantly however the Bats take control of the Standing Stone swarming and chittering around the giant stone monolith, much to the Red Dukes delight.


The Combat Phase over, Turn 1 comes to a close with the Beastmen looking shambolic and having lost control of the Standing Stone. Turn 2 will be interesting!


... TURN 2 to follow in a future post!

Wednesday, 10 June 2015

The Beastmen Army for Warmaster


Background: If you do a search around the web, you will find an excellent set of Trail Rules for new armies for fantasy Warmaster. These armies reflect the many armies available in the Old World of Warhammer. Within that document, you will find a list for the Beastmen. A couple of years ago, GW updated their Warhammer Beastmen Army with new models and a revamp of their rules. Needless to say, I was hooked! I'm not much into 28mm (love the Beastmen and War of the Ring though!) as I like BIG battles with lots of units and not skirmishes. 28mm, I find, tends to lend itself to more of a skirmish setting than true battles, and costs a bundle. 10mm on the other hand, now that's real armies!

So given the revamp for the Beastmen, I set about coming up with a set of house rules for my Warmaster Beastmen Army that was on the painting table (and that you will see in the Whatever Happened to the Red Duke dustup). The goal was that I wanted to create a Chaos Army that was definitely different from the other Chaos army selectors. In particular with all the new monsters available to the Beastmen revamp, I wanted an army that had lots of choice for weird and wonderful critters. One that could make good use of forested terrain on the battlefield and that could keep your opponent guessing where their foe could appear next on the table edge.

Given that this was a total re-write of the Trail Rules, and that the Red Duke Battle-report has the Beastmen being trailed with these house-rules, I thought I should post my house rules here. So, without further delay,  I give you the Beastmen....
***********************************************************************************
 
Army Rules

Children of the Forest. The Beastmen's natural habitat is the thick forests of the Old World. As such, all Beastmen units are able to travel through woods and forests. They are also adept at communication through the forests with their bray shouts, hoots and calls being very audible through the thickets. As such, Beastmen do not suffer any command penalties when attempting to order units that are within a wood or forests terrain.

Beastmen Ambush. Endowed with the cunning of the hunting pack, Beastmen are adept at encircling the enemy army and attacking from an unexpected direction. Certain Beastmen units may ambush. This means that half of a total number of Ungor, Ungor Raider and Gor units (rounded down) may count as ambushers rather than be deployed on the table at the start of the game. Ambushers may be divided into Brigades or kept as individual units. Each brigade or individual unit of ambushers is known as an Ambushing Party.

Beginning in the Beastmen players’ 2nd turn, at the start of the players’ Command phase before Initiative, they may test to see if any unit or brigade of ambushers enters the table. The player can choose to delay the arrival of any ambushes to subsequent turns if they wish. They are not required to test for ambusher arrival in turn 2. The player also is not required to test for ambusher arrival each of their turns after the turn 2. The decision to test for ambusher arrival is solely up to the Beastman player. The only stipulation is that they cannot test for ambusher arrival in turn 1.

The Beastmen player tests for each ambushing party (unit or brigade) separately to see if they enter the table. The player does not need to test for all their ambushes, only those ambushing parties they wish to bring on to the table during that turn. The player can chose to leave some ambushing units or brigades for a later turn. Ambushes entre the table in to following manner:
 
To see where the ambushers enter the battlefield, use the following procedure. Before Initiative in the Command Phase, roll a single dice for each ambushing party the Beastman player wishes to bring on to the game table and consult the chart below. Any ambushing unit or brigade that enters the table must be place along the table edge identified in the chart. Ambushers may be place anywhere along the identified table edge, but not in impassable terrain. Ambushers may be placed within Initiative range of enemy units, but they must first be placed along the identified table edge.

When ambushers enter play, place them along the table edge designated above in any formation desired by the Beastmen player. The ambushers may then move by Initiative or be given orders later in the Command Phase.
 
At the end of the game, any ambushers that remain in ambush and have not yet been deployed on the game table are considered to have become lost and are regarded as having been destroyed for the sake of determining victory points for the Beastmen player’s opponent.


Primal Fury. Beastmen are rightly feared for their primal and violent nature and in battle this nature is never more evident. Beastmen are known to throw themselves into violent, frenzied attacks against their foes, becoming consumed by a savage fury tearing apart their hated foes with little regard for their own self-preservation.
 
Each unit capable of Primal Fury that charged into combat during the Command Phase of the current turn, roll a single die. On a roll of 5 or 6, that unit becomes enraged by Primal Fury. During the Combat Phase, all units enraged by Primal Fury may reroll one failed attack dice per stand during the first round of combat. Primal Fury does not apply to combat that has carried over from the previous turn, only combat that was initiated by a charge in the current turn. Primal Fury only lasts for the first round of combat.

SPECIAL Rules (see the army selector below)

1. Beastman Ambush: These units can ambush. See the Beastmen Ambush rules above.

2. Minotaurs. Minotaurs are subject for Bloodlust – they always use initiative to charge if possible and cannot be given orders instead. Minotaurs never use initiative to evade and must pursue or advance where possible. Also they are immune to terror.

3. Centigors. Centigors are cavalry, and are both able fighters and skirmishes (throwing spears and other barbs). They can shoot in any direction (360 degree arc of sight) in range up to 15cm. When they charge into combat, they gain the Shock  troop type ability (refer to p. 127 of the Warmaster Ancients Rulebook)

4. Chaos Spawn. Spawn cannot be given orders in the Command phase unless they are part of a brigade that includes at least one unit other than Spawn. Spawn can act on their initiative as normal.

Spawn can be included as a bonus to the size of the brigade up to a maximum of one Spawn per non-Spawn unit. For example, 4 Bestigor units plus 4 Spawns counts as a brigade of 4 units - the 4 Spawns do not count towards the size of the brigade. Where several Spawns are brigaded with fewer non-Spawn units, then only the additional Spawn count towards the size of the brigade. For example, 2 Bestigor units and 4 Spawns count as 4 units - 2 Spawns are included for ‘free’.

Spawn cause terror in its enemies.

Spawn have a shooting range of 15cm and can shoot to the side or behind as well as to the front. Just measure the range form any stand edge, front, side or rear. They can therefore shoot at any enemy charging them from any direction.

5. Shaggoth. Shaggoth must always be given a separate order. It cannot be brigaded with other troops even with other Shaggoths. It has a great many hits, 8 in fact, which are almost impossible to inflict during even a fairly lengthy combat engagement. Because Shaggoths have so many hits we must consider the possibility of hurting the Dragon Ogre Shaggoth and reducing its effectiveness in subsequent turns. Therefore, if a Shaggoth has accumulated 4-7 hits by the end of the Shooting and Combat phase it is deemed to have been badly hurt. Once a Shaggoth is badly hurt then all accumulated hits are discounted and its maximum Hits value and Attacks are halved for the rest of the battle (to 4 Hits and 4 Attacks). Shaggoth causes terror in its enemies.

6. Doombull. Ungors, Gors and Bestigors joined by a Doombull will become subject to Bloodlust in the same way as Minotaurs and can only receive orders from the Doombull as long as it is part of the unit.

7. Tuskgor Chariot. Beastlord or Wargors (Gor Heros) can ride a Tuskgor Chariot. A character riding a chariot adds +1 to his Attacks.

8. Giant. Giants are maddeningly dim-witted creatures with a fondness for strong beer and the raw flesh of men, Elves and even Dwarves. Because of their turgid mental processes and weakness for drink they must always be given a separate order. They cannot be brigaded with other troops, although several Giants can be brigaded together if you wish. If you attempt to give an order to a Giant and fail, then you must make a test to see what he does. Ignore potential blunders; these are taken into account by the following rules. Roll a dice and consult the Giant Goes Wild chart.

Where Giants are brigaded together roll for each separately. A Giant causes terror in its enemies.

Giants have a great many hits, eight in fact, which are almost impossible to inflict during even a fairly lengthy combat engagement. Because Giants have so many hits we must consider the possibility of hurting the Giant and reducing his effectiveness in subsequent turns. Therefore, if a Giant has accumulated 4-7 hits by the end of the Shooting phase or Combat phase it is deemed to have been badly hurt. Once a Giant is badly hurt all accumulated hits are discounted and its maximum Hits and Attacks are halved for the rest of the battle (to 4 Hits and 4 Attacks).
-see Warmaster Rulebook for the Giant Goes Wild Table -


NB: Still playing with the rules for the Cygor, Ghorgon and Jabberslythe so will update this post in the future with these additions.

Sunday, 7 June 2015

Whatever happened to the Red Duke? A Warmaster 3,500 point-a-side Battle Report - part 1

 
The vampire known as the Red Duke terrorised the good peoples of Bretonnia again in 1932 before he was vanquished near the Forest of Chalons. It was long assumed that the vampire perished in that battle, however its body was never found amongst the dead at the battles end. Generations of Questing Knights have ventured into the Forest of Chalons to seek out this vile creature, if it still lives, and destroy it forever. However no evidence of the vampire has ever been found.

Peasant talk and the idle chatter heard in the inns of Chalons recount this famous battle. They also speak of rumours that the Red Duke escaped into the Forest of Chalons at the battles end, never to be heard of again. Peasant folk then usually lower their voice to a whisper and tell the odd tale or two of travellers on the roads near the Forests disappearing or of villagers hearing screams in the night coming from the Forests eves. Those who live near the eves of the forests know to avoid it and their thoughts, when they look to the Forests, are ever on what became of the Red Duke.

The battlefield

Background
The Red Duke, seeing that all was lost, and that the flower of Bretonnia was closing in for the kill, fled into the Forest of Chalons. The forests is known for its many denizens, not least of which are Orcs and Beastmen. However, within the forest are powerful sites where arcane energies can be harnessed. The Beastmen guard these sites and hold them sacred as the Winds of Magic howl through them. If the Red Duke is ever to exact its revenge on Bretonnia, its must control these sites and build its strength once again. Fortunely for the Red Duke, the battle it lost has provided the raw materials it needs to build a strong enough force to see off the Beastmen and take control of these sites.

Points
Each side has 3,500 points to spend (this Battle report has each side at around 3,200 points due to running out of painted miniatures) :(

The scenery on the field

Battlefield
A large clearing in the Forest of Chalon

Scenery on the battle-table includes:
  • Forest down one long edge of the table
  • Two small woods within 20cm of either side of the centre of the table
  • One standing stone Monolith in the centre of the table
  • One Summoning Circle standing stones within 20cm of the forest edge
  • Other scattered hills as mutually agreed upon by the players
Special Rules

i) The Monolith standing stone permits spell casters located between its base to add +1 to all rolls when casting spells. It also permits the spell caster to attempt to dispel any spell cast in their opponents Shooting Phase as though the spell caster had a Scroll of Dispelling. Each spell caster can only use the dispel feature of the Monolith once per game. Any number of spell casters can be located under the Monolith at the same time.

The Monolith

ii) The Summoning Circle can be used by Beastmen spell casters to attempt to call a Cygor, Ghorgon or Jabberslythe as an ally to the Beastmen army. The Beastmen player must pay for this creature as part of the 3,500 points allotted to his army. The caster must entre the Summoning Circle on during the end of the Command Phase of the Beastmen players turn (when characters move). The creature being summoned will then appear at the start of the Command Phase of next turn. The creature therefore takes one full turn to arrive and the Spell caster must remain within the Summoning Circle for that entire turn, or the ritual to summon the creature will fail. If the creature is not summoned during the game, its cost does not count towards the victory points awarded to the other side.

Units inside the Summoning Circle gain Defended status.

The Summoning Circle on the edge of the forest


***********************************************************************************
The Red Dukes forces arrayed for battle

The Red Duke's surviving forces
* indicates house rules developed units
  • 8 units of Skeletons (240 points)
  • 7 units of Zombies (245 points)
  • 5 units of Grave Guard (300 points)
  • 4 units of Ghostly Legion (220 points) - infantry *
  • 2 units of Crypt Horrors (220 points) - infantry *
  • 4 units of Skeleton Cavalry (240 points) - cavalry *
  • 2 units of Black Knights (220 points) - cavalry *
  • 2 units of Ghostly Riders (200 points) - cavalry *
  • 4 units Dire Wolves (160 points)
  • 1 unit of Dire Wargs (100 points) - cavalry *
  • 3 units Bat Swarms (120 points) - monster *
  • 1x Terrorgheist (300 points) - monster *
  • 1x Mortis Engine (300 points) - chariot *
  • 2x Mounted Wight King (160 points) - hero
  • 2x Lich (160 points) - wizard
  • The Red Duke (150 points) - general
Total = 3335 points

Malagor's minions draw up to defend their sacred sites

Malagor - The Dark Omen's army
* indicates house rules developed units
  • 4 units of Ungors (200 points) - infantry * (these lads can ambush)
  • 1 unit of Ungor Raiders (40 points) - infantry * (these lads can ambush)
  • 5 units of Gors (250 points)
  • 1 unit of Bestigors (75 points)
  • 2 units of Minotaurs (240 points)
  • 3 units of Centigors (240 points)
  • 3 units of Chaos Hounds (90 points)
  • 1 unit of Razorgors (100 points) - cavalry *
  • 4 units of Harpies (260 points)
  • 1x Chaos Spawn (110 points)
  • 1 unit of Gor Dragon Ogres (250 points)
  • 1x Shaggoth (175 points) - monster *
  • 1x Chaos Giant (150 points) - monster *
  • 1x Jabberslythe (300 points) - monster *
  • 1x Beastlord (125 points) - general
  • Malagor (150 points... and the real general!)
  • 1x Wargor (80 points)
  • 1x Centigor Hero (80 points)
  • 1x Doombull Hero (85 points)
  • 2x Bray-Shaman (160 points) - wizard *
  • 1x Tuskgor Chariot mount for the Beastlord (+10 points)
Total = 3170 points

Two units of Ungors placed in ambush are next to the Jabberslythe awaiting to be summoned forth to battle

Stay tuned for the opening shots in the next blog entry....

Sunday, 31 May 2015

The Wolves of Isengard

"Send forth your Warg riders." - Saruman.... One brigades worth of them, in fact!


Finished the Warg Riders that I mentioned the other day. As I said in that post, I have had these sitting around for several months now waiting to be painted.


In the end it was much easier than I thought it would be. The key to painting them was to first of all basecoat them in Chaos Black and then wet-brush them in Bestial Brown. This gave them the dirty look universal to all Orcs in Middle-earth. It was then a matter of painting the warg mains in Snakebite Leather, then use a heavy drybrush with a dark grey for the face, followed by a light drybrush with a light grey again for the face.


For the riders, I used Boltgun Metal heavy drybrush for the armour, and then picked out special features, such as the arrow fletching or fur clothing, in a suitable colour. The skin of most of the orcs I left in the brown colour, but some of the orc flesh was painted in Rakarth Flesh, some others in Administratum Grey and some others still in a light green. I washed the entire model in a brown wash to blend the colour transitions and to give the extra dirk look. The brown wash also gives a tinge of rust to the armour and weapons, just the way orcs liken them.


I deliberately left the orc shields without any insignia on them. This is so the Warg Riders can be used for Isengard, Mordor, Angmar, Moria, Mount Gundabad, etc. The Warg Rider leaders are the only ones to carry any insignia on them and thus identify where these guys come from.


You can see a bit of the diversity in poses amongst the Wargs and Orcs in the two images below.


The play testing stats for these guys is currently as follows:

Type        Attack   Range   Hits   Armour   Unit Size   Pts per Unit       Min/Max   Special
Cavalry     4/1         15         3          6+             3        ? (80 to 100?)        - / 2        Shock Cav. (WMA)

Final picture below shows the Warg Rider leader next to an Isengard Sub-general. You can see how the size of the Warg Riders compare to the size of Isengard Sub-general and see that they fit together well.

So only need to do the bases of these guy's and they are ready to chase down Rohan citizens or thirteen shabby Dwarves and one well dressed Hobbit!