TURN 3
Note: You can find Turn 2 here.
Initiative Phase
The Bandits win the Initiative this turn again. The Martians and then the Mercenaries will follow in sequence thereafter.
Movement Phase
The Bandits get first movement and begin to fall back towards the Skip Bin next to the abandoned warehouse or move from the rear of the truck to the front, cautious to keep cover as they go. Other Bandits hug the factory wall hoping to score another kill on the Martians whilst remaining in Partial Cover.

Now it's the Martian's phase to move. The Martian grunt guarding the woman hostage, at the sound of gunfire and explosions, leaves her and moves to assist his comrades.

Meanwhile, the Martian grunt outside the factory falls back to just inside the entrance, not wanting the possibility of his head exploding like his comrades did. The Martian on the mezzanine floor has had enough of the Zombies and takes Aim. The Martian Leader and grunt, Rattled by the grenade explosion last turn, get back to their feet.


Finally, the Mercenaries get their chance to move. Moving up towards the factory entrance in two firing lines, the Mercs make good use of the cover afforded by the abandoned military vehicles.


Last of all, the Zombies get to move. They automatically move to the closest sound, if they have no line of sight (LOS) to a target or move to the closest target if they have LOS.
The two Zombies inside the factory compound move towards their nearest target, which just happens to now be one of the hapless Bandits near the factory main entrance. Meanwhile a third Zombie enters the compound through the main gate.


Finally, one last Zombie, who had been on the other side of the line of military vehicles, rushes out towards the Merc Leader. However, it comes up just short of being able to engage the Leader in a Fight.

One final event now has to be checked for. The captive human woman, now all alone as the Martian has left the room to help his comrades, has the chance to attempt to escape if her nerve holds true. On a roll of 1 or 2 she will overcome her fear and flee the safest way possible. Each Turn she is alone, she will be able to add +1 to her die roll to gather her courage and attempt escape. So, the next turn, she can attempt to make her escape on a roll of 1 to 3. The tune after, the roll will be 1 to 4, etc. Eventually, if left alone for and enough turns elapse, she will automatically find her courage and make a break for it.
She rolls a 5. She remains overwhelmed by her situation and stays where she is.
Fight Phase
The Bandits have the Initiative this turn and so Fight first. The Bandit if melee with the two Zombies in the factory compound starts throwing punches at the brainless horrors before him. He scores two hits to the Zombies two Survival successes. Thus, the fighting ends in a draw and he is forced to stay in the melee for next turn fighting for his life. As this is the only fisticuffs, the Fight Phase ends.

Shooting Phase
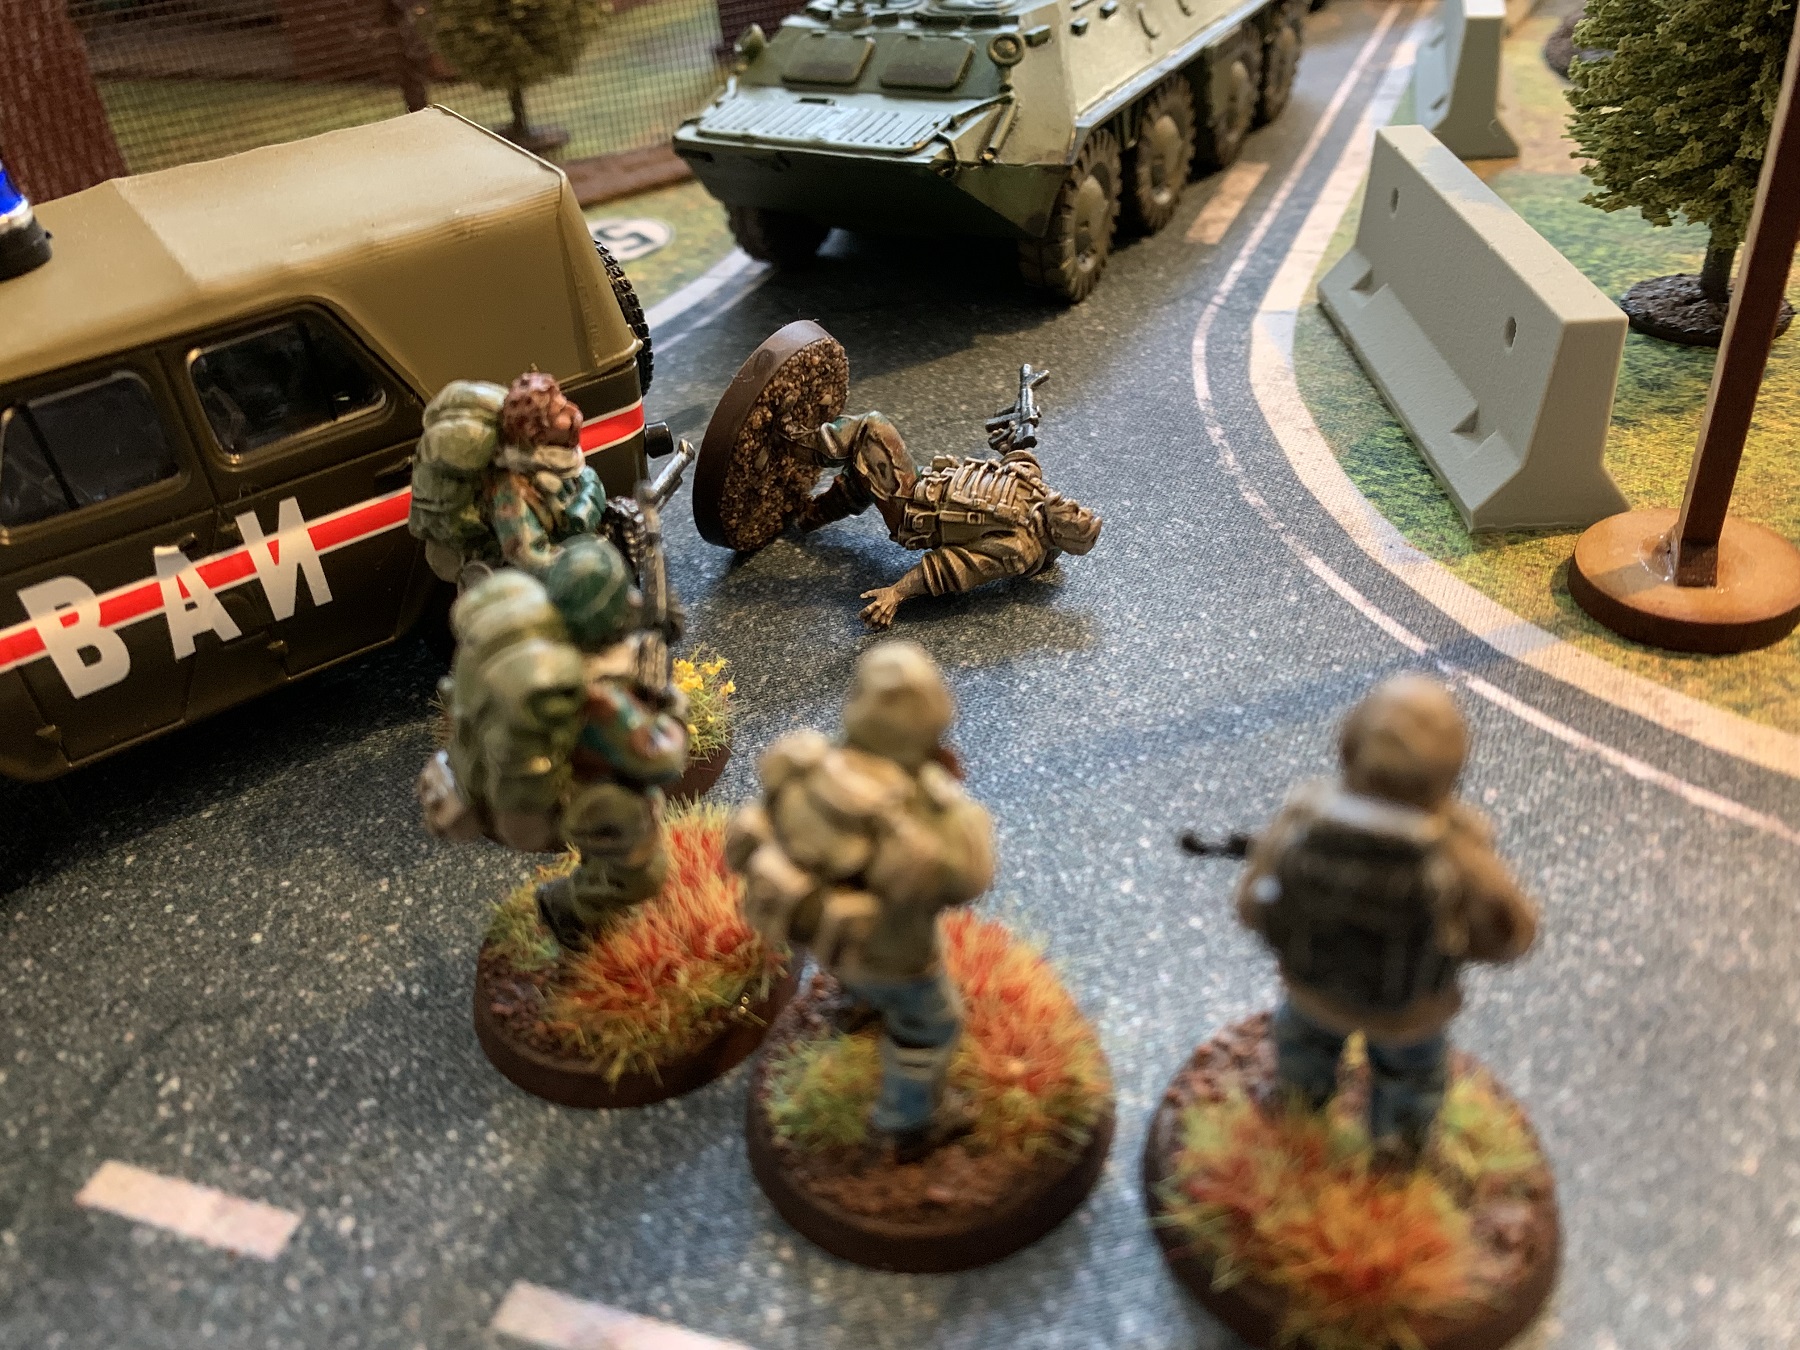
The Bandits get the first chance to fire off some rounds. Only the Bandit by the factory window and a Bandit by the front of the truck, have any LOS to an enemy. Both can see ugly Martian heads through the factory windows. Those Martians being in Partial Cover.


The Bandit at the truck shoots through the window but misses his Martian target when the alien rolls four Survival successes due to a number of 8's coming up on the dice. Should have cleaned his gun barrel before heading out today!
Not to be outdone, the Bandit at the window drops another grenade through the broken window frame.

The resultant explosion impacts the Martian Leader and another Martian grunt, knocking them to the ground. But the Martian armour proves too strong, and both become Rattled but and won't be able to shoot this turn. But another lucky escape for both of them. With that, Shooting passes to the Martians.

Three Martians have LOS on a target, that being the two un-Rattled grunts on the ground floor near the main door, and the Martian on the mezzanine floor. Their only target however is the Zombie that just entered the compound.

The Martian on the mezzanine floor got to Aim during the Movement Phase and so opens fire first, scoring a total of four hits. As the smoke clears, the Zombie manages to role a total of six Survival successes, plus Zombies are considered to be Armoured, so a total of seven Survival successes. As the smoke clears, the Zombie shambles onwards. It's missing an arm and has some holes in it. But it's still going, nonetheless.
Next, one of the two Martian grunts on the ground floor fires, scoring three hits. But the Zombie manages a total of three Survival successes, meaning it's a draw and the thing is still standing. It does have a few more chunks off it though.
Finally, the last of the two grunts on the ground floor fires his heat ray, scoring just one hit. Yet again, the Zombie miraculously rolls a single Survival success and remains lumbering towards them. This lump of brainless flesh has taken three hits from Martian heat rays and is still standing. Incredible!
Now Shooting passes to the Mercs. Their immediate concerns lay with the Zombie that's gotten up close and personal as well as the four Zombies lumbering down the road towards them.


The Merc Leader opens up point blank on the Zombie in front of him, riddling it with bullets. But it survives. His colleague next to him also opens fire on the creature, scoring five hits (thanks to rolls of 8 granting additional die rolls!) to the Zombies single Survival success, tearing the hapless thing into nondescript body parts and spraying the green military vehicles next to it in a shade of red.
The next Merc in the right-hand firing line, spying the Zombies coming down the road, tosses a grenade. The resulting explosion however only manages to kill a single Zombie.


Finally, it's the Zombies turn. They have one of the Bandits locked in melee and, as Zombies get to act last of all, get a cheeky out of sequence Fight Phase. By rights, they should fight in the proper Fight Phase, but this seemed more cinematic and dramatic. So, I decided, "Why not!"
The Bandit manages to fend off the first Zombies attack but is dragged down by the second Zombie and has his neck bitten off. That's another Bandit dead.

With that Turn 3 comes to an end. From Turn 4 onwards, the Martians will test each turn to see if they have repaired their saucer. If they do, they can escape back to their Mothership.
Stay tuned!