TURN 4
Note: Turn 3 can be found here.
So, things aren't looking too well for the Bandit crew. They have lost several crew members already and after shooting it out with the Martians, they now are facing down mindless Zone Zombies. Ex-Soldiers who have had their brains fried by the effects of one of the frequent emissions within the Zone.
Initiative Phase
The Mercenaries finally get a chance to act first, winning the Initiative. The Bandits will follow them and then the Martian faction. Last of all will be the Zombies. The benefit of this is that the Martians are now locked down for the entire turn. As soon as they fix their flying saucer, they can escape when each Martian is onboard. With the Mercs getting the Initiative, the Martians are last of all to act this turn. So we will see how they go fixing their craft.
Movement Phase
The Merc's move up to the objective, the abandoned factory where the strange aircraft has been spotted. They move keeping the abandoned military vehicles covering their approach.
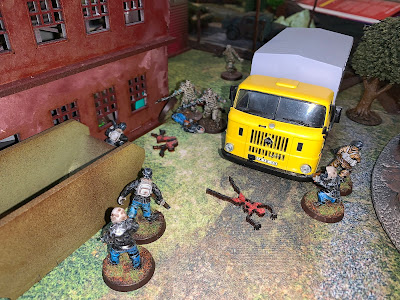
The Bandits, having now lost four of their crew, have had enough. Almost half their number gone and nothing good to show for it, it's time to get out of here. So, they begin falling back the way they came covering each other. But they can't make it off the map yet.
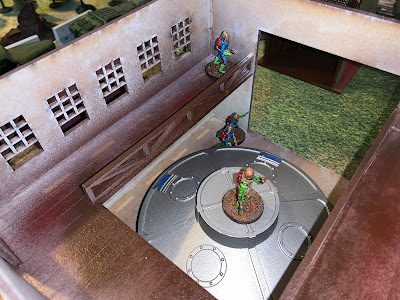
It's now time for the Martians to move and first off, their Engineer must test to see if he can get their saucer working properly again. Needing a total of 8, the Engineer rolls a d8 and adds the turn number (i.e. 4). He rolls a 2! Nope, the ship won't kick over and frustration is written all over the Engineers ugly face as he shouts expletives in Martian; "Akakakakakakak." But the Engineer remains at his post so he can try to fix the saucer again next turn.
The Martian Leader and his offsider, having been Rattled by a grenade explosion last turn, get themselves to their feet.
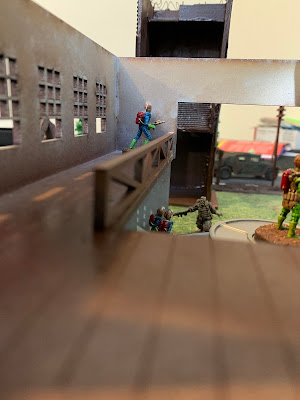
The Martian's on the other side of the main entrance to the factory meanwhile take positions to better get shots at the approaching Zombie who seems to be living a charmed, if somewhat brain-dead, life right now. The Martian on the mezzanine floor also wants to end that Zombies meaningless life and so Aims instead of moving this phase.
Finally, the Zombies shaffle forwards. The two Zombies who took down the Bandit last turn surge after the retreating Bandit crew. One of these Zombies manages to catch another hapless crewmember in a melee.
Meanwhile, the charmed Zombie moves towards the Martians who took a few chunks off it last turn.
Out on the road, the remaining two Zombies from the truck shuffle past the abandoned BTR70 and head in the direction of the Mercenaries after losing sight of them.
Now there remains the issue of the Martian's female human captive. She has been left all alone again and may just have worked up enough courage to make a break for it. She now needs to roll 1 to 3 on a d8 to have enough courage to make a break for freedom. If she doesn't this turn, and remains on her own, her chances next turn will go up by one (i.e. 1-4 on a d8). She rolls a 3 and she is out of there!
She moves quickly and as quietly as possible to the ladder and up to the first floor. Spying that the Martian on the mezzanine floor has his back to her, and the Martian Engineer is also too busy to spot her, she makes a break for the side entrance to the factory. All she can hope for is that the Martian on this floor doesn't look over his shoulder outside one of the windows and spy her. Of course, she has no idea about the two Zombies on the road. This could prove interesting.
Fight Phase
The only melee that currently exists this turn is the Zombie and Bandit. The Zombie proves too good for the Bandit and drags him down screaming as it chomps on his neck. That's five dead Bandits now and the crew drops below half.
Shooting Phase
Only one Merc has any LOS on anything in range, and that's a Zombie. But the Zombie is in Partial Cover due to the vehicles. The Merc shoots and misses the damned thing. Well, be probably hit it a bit, but the creatures Survival successes outnumbered the Merc's shots. These things have proved to be pretty resilient against bullets and heat rays.
Now it's the Bandits turn to shoot. The terrified Bandits open up at close range on the Zombies. The left most Bandit shoots at the Zombie in front of him, but the thing proves too resilient to be taken down. The remaining Bandits open fire on the other Zombie that still has blood and gore streaming from the entrails of their former colleague. The three Bandits fire, each in turn. But incredibly the Zombie shrugs off the hits one after another, surviving them all. The Bandits must have been shooting wildly in terror. Blind panic will do that to you.
Now the Martians get to shoot. The Martian on the mezzanine floor, not having moved last turn, gets an Aim bonus. He targets the Zombie below him and fires his heat ray. Intense concentrated heat blasts down at the creature, the Martian scoring 3 hits. But the Zombie rolls 3 Survival successes and survives. This thing is truly living a charmed brain-dead life.
Next, the Martian on the ground floor, closest to the Zombie, fires his heat ray at point blank range. This time 4 hits to 2 Survival successes sees the creature finally burned to ash. This Zombie has survived five shooting attacks without issue. However, in the end, it was only flesh and blood. Well, now it's just ashes.
Now, only the Martian Leader and his offsider have any target in LOS. The Martian grunt spies the Bandits through the window and shoots his heat ray and one of them. Payback time as the heat ray does 3 hits to the Bandit's 1 Survival success. With that, another Bandit turns to ash.
This must have made the group of Bandits on the right hit the dirt as the Martian Leader only manages to score 1 hit with his own shot, his Bandit target rolling more Survival Success and thus escaping by the skin of his teeth.
One that note Turn 4 comes to a close. Of the nine original Bandits in the crew, three now remain alive and are in a blind panic determined to get out of there. We'll see how that goes.


