Saturday 28 November 2020

Quarantine Capers - The Battle of Coronel (WWI) - Part IV

 Part III can be found here.

TURN 6

The German's finally detect Good Hope's shape in the murky conditions, spying her on the western most line of the British. They now realize that they are facing the major Royal Navy forces this side of the Pacific, with the exception of H.M.S. Canopus.

The Royal Navy again wins the Initiative and continues to head southwards under a Full Ahead! special action.

Otranto, being slower than the rest of the Royal Navy squadron, begins to fall behind. As such, her captain turns her SSW in an effort to move to the outer (western) end of the Royal Navy line and gain better screening by the British cruisers.

Otranto takes evasive action

The German's doggedly continue their pursuit of the British with their own Full Ahead! special action.


Attack Phase

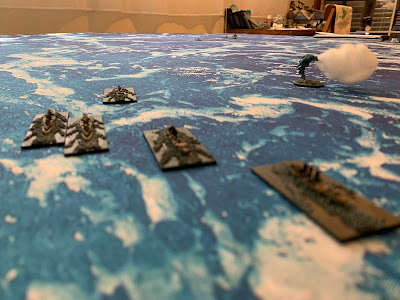
Glasgow again fires her X turret at Leipzig. Otranto also opens up with her port side 6" guns at Leipzig. All shots miss their target, falling just short.

Leipzig's luck holds!

With no other ships in range, the Attach Phase comes to an end and so too the turn.

TURN 7

The Royal Navy retains the Initiative again for Turn 7.

The British continue their southern heading maintaining the Full Ahead special action. Otranto however continues to slip behind the rest of the Royal Navy ships and risking becoming isolated.

Wait for me!

The Germans also continue to push southwards with a Full Ahead! special action.


Despite the relentless chase, the distance between the two squadrons begins to open up. The condition of the engines of Scharnhorst and Gneisenau begin to pay a toll on the Germans ability to run down the British as they start to fall behind from their squadron.


Attack Phase

Otranto again targets Leipzig but once again misses.


Leipzig's 4.1" guns however are well out of range of Otranto and so she holds fire until she can close range. As no other ships are in range of any target, the turn comes to a close.

Sunday 15 November 2020

Quarantine Capers - The Battle of Coronel (WWI) - Part III

 Part II of this game can be found here.

TURN 4

Royal Navy gains the Initiative for this turn.

A check reveals to the Germans the shape of Monmouth in the gloom west of Otranto. Good Hope however remains undetected by the Germans. The Royal Navy is aware of the full German squadron.

The Royal Navy uses a Full Ahead special action in the hopes of putting enough distance between themselves and the German ships. By doing this they hope to also join up with Canopus to even the odds before re-engaging the enemy.

The Royal Navy ships all move at their top speed through the Bad Weather conditions, turning south away from the German squadron.

The Germans also perform a Full Ahead special action.


Attack Phase

Glasgow fires its X turret at Leipzig, which just happens to be in range of her 6" guns. The shot however falls short of its target.


Leipzig is out of range of Glasgow and blocks the line of sight from Scharnhorst and Gneisenau. As such, the Germans are not able to spot the Royal Navy ship and return fire. With that, the turn ends.

TURN 5

Royal Navy again gains the Initiative for this turn.

The Spotting Check shows that the Bad Weather still hampers the Germans from spotting Good Hope as part of the Royal Navy squadron.

The Royal Navy keeps steaming south under the Full Ahead special action. Given the slowed pace of Scharnhorst and Gneisenau in this scenario, and the Bad Weather, the Royal Navy begin to slowly pull ahead.


The Germans, seeing their chance to cripple the British presence in the Pacific, also push their engines to Full Ahead in pursuit of the Royal Navy ships.


Given the close proximity of the models to the edge of the table, and the fact that this scenario is a floating map, all models are readjusted to accommodate from the floating map arrangement.


Attack Phase

Glasgow fires off a salvo fro its X turret 6" guns at Leipzig. However the shot falls short of the enemy light cruiser.


The Germans are again out of range and line of sight. So this brings to a close the turn as both sides continue to make best speed into the gathering gloom of the twilight.

Monday 9 November 2020

Quarantine Capers - The Battle of Coronel (WWI) - Part II

Here continues the Victory at Sea game of The Battle of Coronel. Part 1 can be found here.

TURN 1

The German squadron has the Initiative for the first turn and moves forwards, heading South West, searching for the Royal Navy.

The German's head SW (Windy Bottoms always points to the North throughout these images)

The Royal Navy heads northwards.

Royal Navy, heading north, spot smoke on the horizon to the NE (Windy Bottoms faces north)

The Royal Navy squadron spots smoke to the NE on the horizon and swing around to that heading in order to investigate.

Pennants spell out to steer NE

TURN 2

This turn, the Royal Navy gain the Initiative. Clearly the smoke sighting as spurred them into action for this turn.

The Royal Navy moves first, heading NE towards the smoke sighting. Glasgow temporarily detaches from the squadron to scout ahead.


The German squadron continue on their SW heading having also noticed black smoke on the horizon.

"Shmoke on za horizon Kaptain!"


TURN 3

The German forces win the Initiative this turn.

The roll to spot the opposing side sees both sides spot enemy ships. The Germans however only spot Glasgow and Otranto in the gloomy weather.

German forces now turn to the WSW in an attempt to cut off the Glasgow & Otranto and maneuver to "Cross their T" so as to open with full broadsides.


Glasgow sees the full German squadron and raises signal flags. Flashing the Otranto, who passes the flashed message to Good Hope, the Royal Navy ships are warned of the approaching Germans.

Admiral Cradock, seeing that he is outgunned, orders a "Come About" Special Action to put distance between his ships and the Germans. His plan is to head south and hopefully rendezvous with HMS Canopus in order to even the odds for a full engagement. The "Come About" Special Action is passed to his ships, however only Glasgow and Good Hope receive the order and execute the maneuver. Otranto and Monmouth miss the signal. However seeing the other ships take a hard turn, they both commence a turn as well, just not as sharp as their companions.

The Royal Navy ships turn to put distance between themselves and the Germans

Glasgow sees the Germans coming at them.


The Germans approach

As the turn occurs, the Germans steam after the Royal Navy. The lead ships of both squadrons start to get into range of one another.

The range closes between the lead ships of the Royal Navy and German squadrons.

Attack Phase

Leipzig opens up with its port side 4.1" secondary battery at Glasgow. The shells however fall well short of Glasgow.

Leipzig opens fire of Glasgow

Glasgow returns the favour with its A & X turret 6" guns. Both shots just miss Leipzig.

Glasgow returns the sentiment to Leipzig

Gneisenau then opens fire on Glasgow with her A & S turret 8.2" guns as well as her portside secondary armament. Both the S turret and the portside secondary guns (their casemate location hampered by the heavy swell) fall short of Glasgow. The A turret has a better aim but also fails to score a hit on her, just falling short.


Gneisenau opens up on Glasgow as well but fails to score a hit.

The end of the turn sees the first shooting of the engagement with no hits being scored by either side.

The Turn closes out with both sides shooting at the other but no hits being scored.

Thursday 5 November 2020

Quarantine Capers - The Battle of Coronel (WWI)

I've been meaning to post this game I played during the lockdown for months now. Being in lockdown, it was naturally a solo game. I used it as an opportunity to teach myself the Victory At Sea - Age of Dreadnaughts rule set.

The battle I chose was a reenactment of the Battle of Coronel off the coast of Chile on the 1st November 1914. I wasn't too happy with the scenario layout in the Age of Dreadnaughts book as it launches straight into gunnery range on the opening turn. As this was a seek a destroy mission for the Royal Navy, who thought they had located the Scharnhorst (if I remember correctly) on its own via intercepted radio traffic to its collier, I decided it would make for a better scenario to have both fleets on the table according to the above map and to see who spots whom first.

Scenario: both the German and Royal Navy squadrons set up based on the map above, with ships in the configurations shown. Each squadron sets up within 20cm of its own table edge anywhere along the NE quarter of the table for the Germans and the SW quarter for the Royal Navy.

Weather Conditions: Bad (all speeds are reduced by -1, all attacks are at a -1 to hit on the die roll, -1 to all Command Checks)

Scenario Special Rules: Scharnhorst and Gneisenau have been at sea for some time and require maintenance. To reflect this, their speed for the scenario is limited to a top speed of 5. Weather Conditions effect this further.

HMS Canopus begins off map and from turn 10 onwards, on a roll of 12 on 2D6, the ship appears with its collier in the SE quadrant of the table not more than 20cm's from the table edge.

Initiative: The Germans have the Initiative for the first turn.

German Fleet: SMS Leipzig, SMS Nurnberg, SMS Dresden, SMS Scharnhorst, SMS Gneisenau

German squadron looking north.

German squadron looking east

S.M.S Leipzig

S.M.S Scharnhorst & Gneisenau


SMS Nurnberg

SMS Dresden

Royal Navy: HMS Good Hope, MHS Monmouth, HMS Glasgow, Otranto, HMS Canopus (off table)

Royal Navy squadron looking east


Royal Navy squadron looking north-east towards the German squadron

HMS Glasgow

Otranto

HMS Monmouth

HMS Good Hope

And also HMS Canopus


Stay tuned for the battle report!